
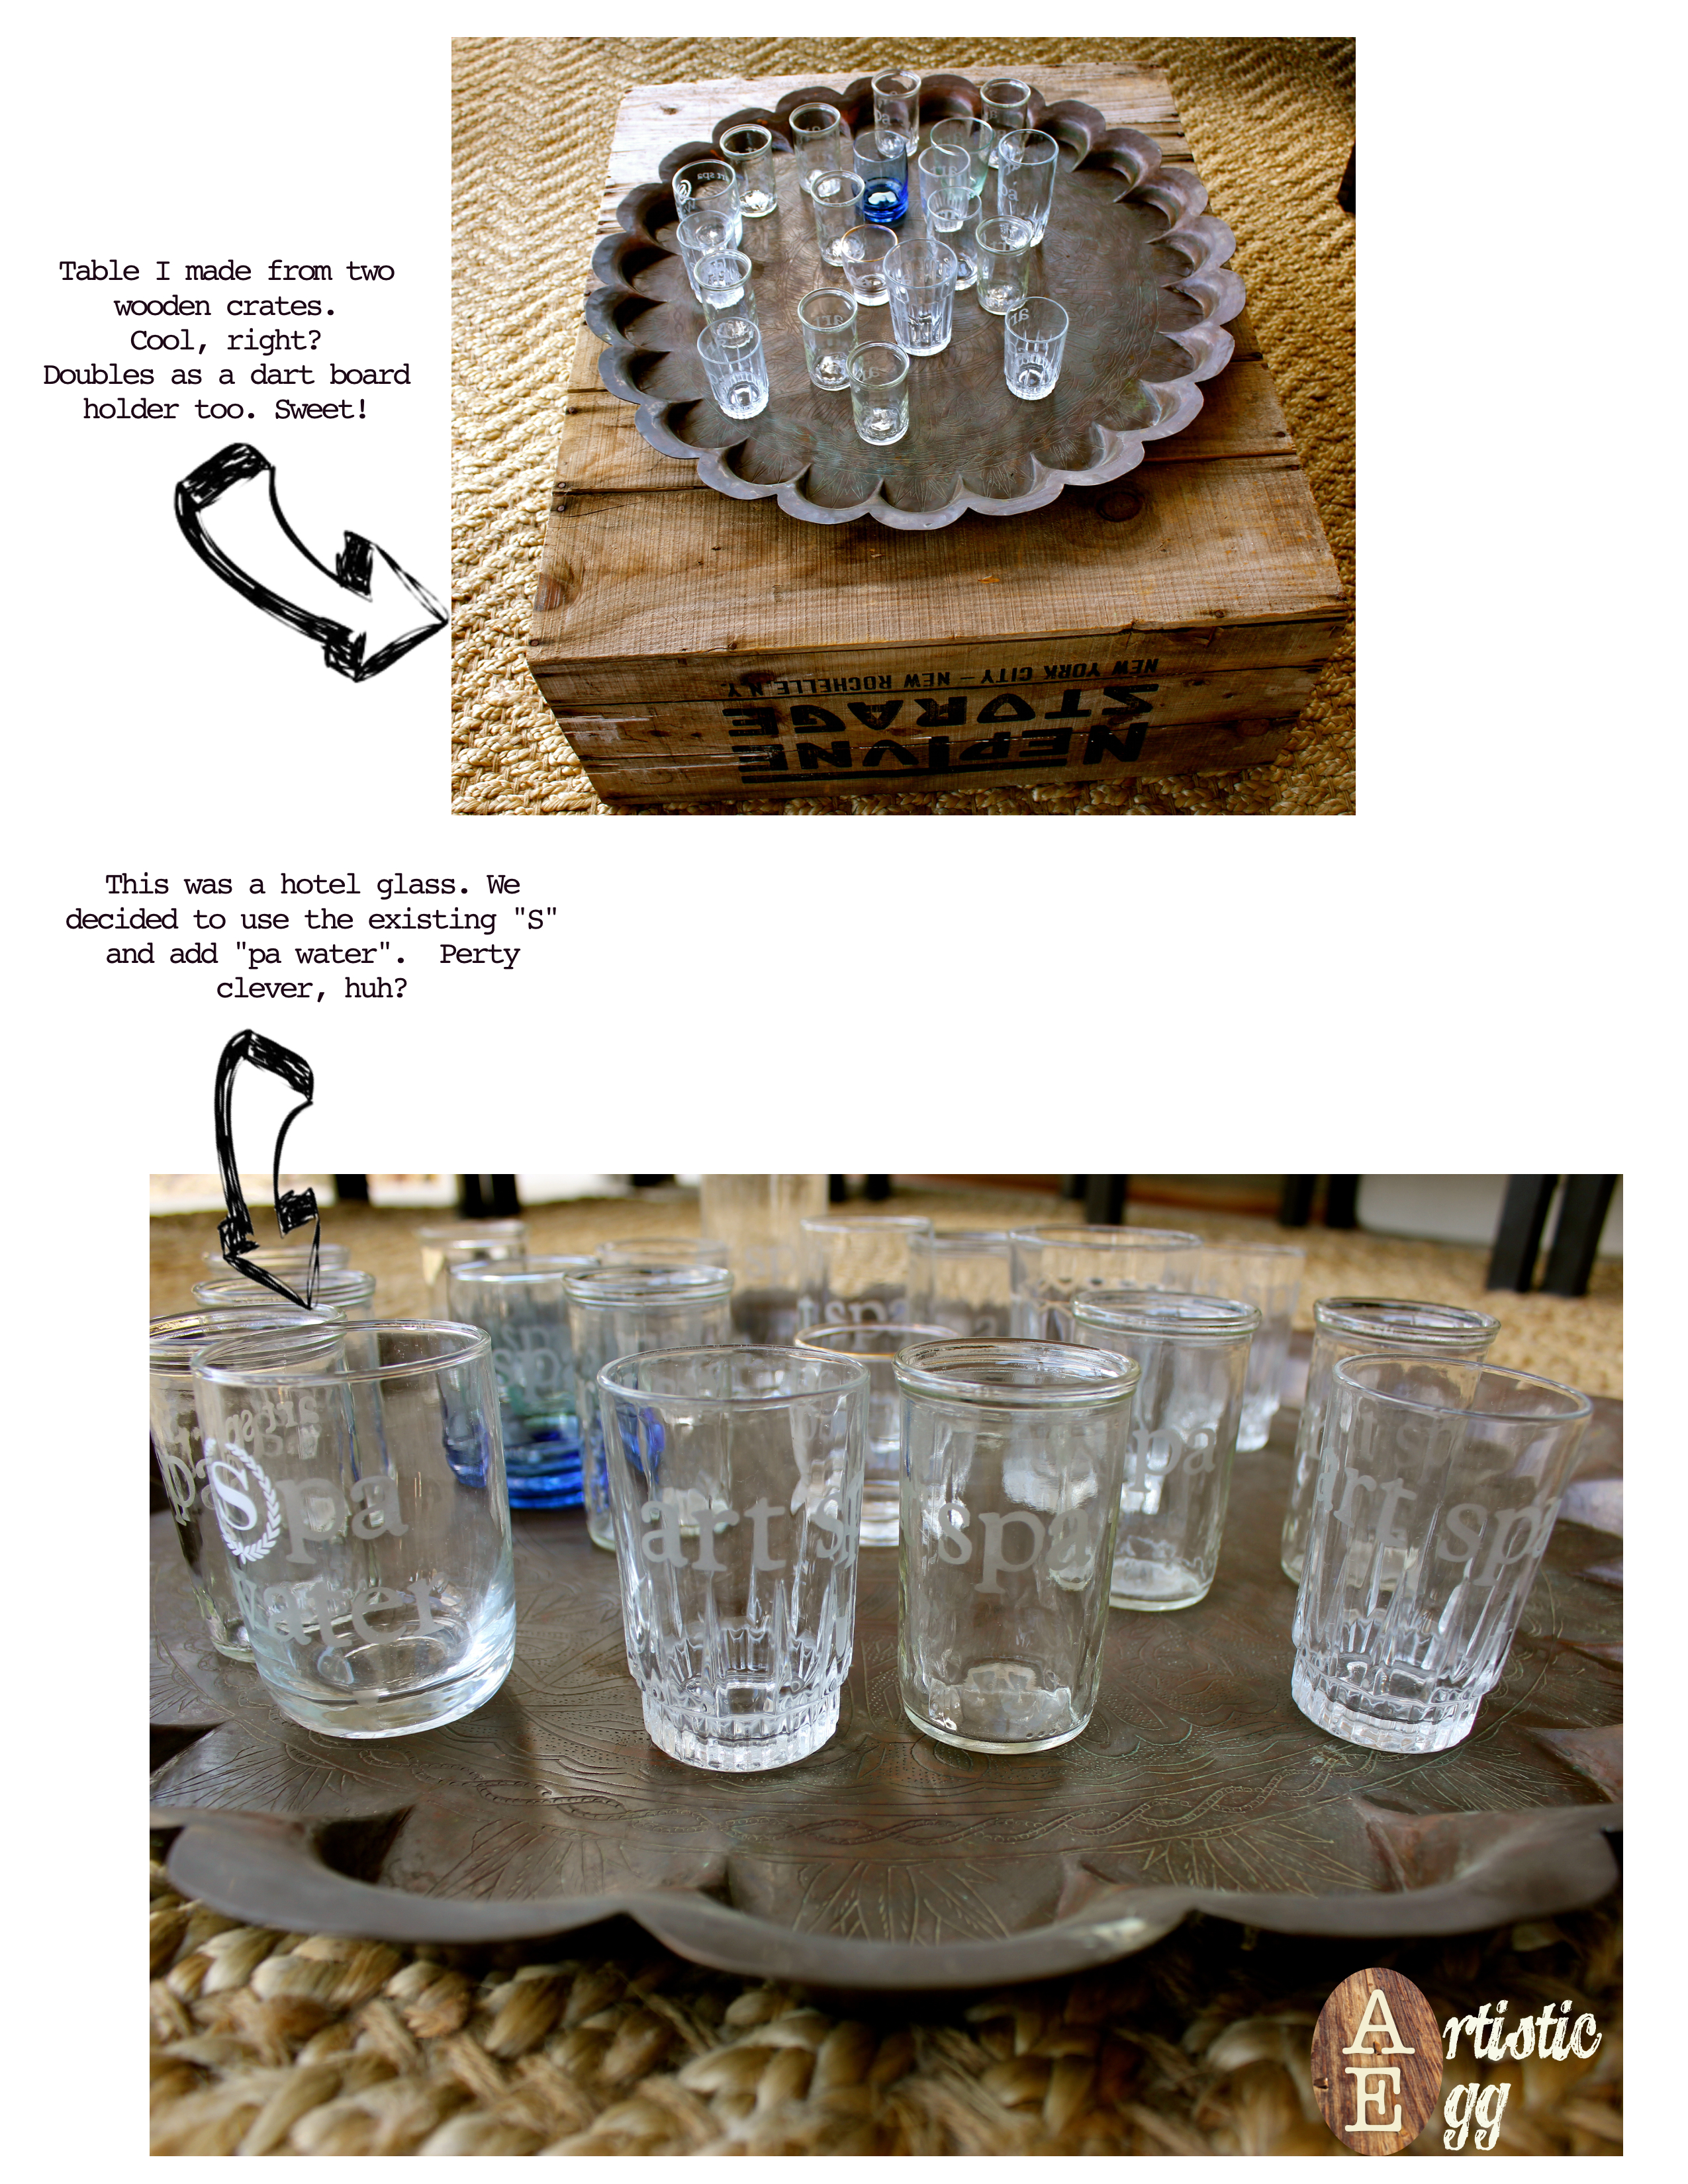
If you know my background, then you know I own a day spa in San Antonio, Texas. We like to serve spa water and, of course, have to serve it in glasses (tastes and feels so much better than plastic). As you can imagine, we go through glasses like water (he,he…water).
One day while Stephanie (my spa manager and pal) and I were out thrift store shopping in search of boards for our staff’s vision boards (more to come on that project) we had an epiphany… Why not use cute, little adorable vintage and used glasses for the spa!!! Dang we’re smart 😉 We found glasses ranging from 10 – 70 cents each.
But you know what? That just wasn’t enough for me. I wanted to etch the name of the spa on the glasses. Uhh, how freakin brilliant is that? We are now proud mamas of 20 etched ART Spa glasses. I was so grateful to have Stephanie over today to help, love team work!
Here are the steps I took to make these baby etched spa glasses:
Supplies:
- Cricut (to neatly cut out letter/words) and Desired Font Cartridge
- Vinyl or Magic Cover Self-Adhesive Covering (comes in a roll and is found in the Art Supplies area of Hobby Lobby and typically used to put over completed scrapbooking pages). I like the Magic Cover because you can see through it and you get a lot for your $. USE HOBBY LOBBY COUPON
- Cutting Mat
- Exacto
- Armour Etch (10 oz $19.99, smaller bottle is available.) USE HOBBY LOBBY COUPON
- Craft / Glue Brushes (Pk of 6 for $1.99)
- Wooden Skewer (to stir Armour Etch before each use)
- Tweezers
- Desired Glass Piece to Etch
Directions:
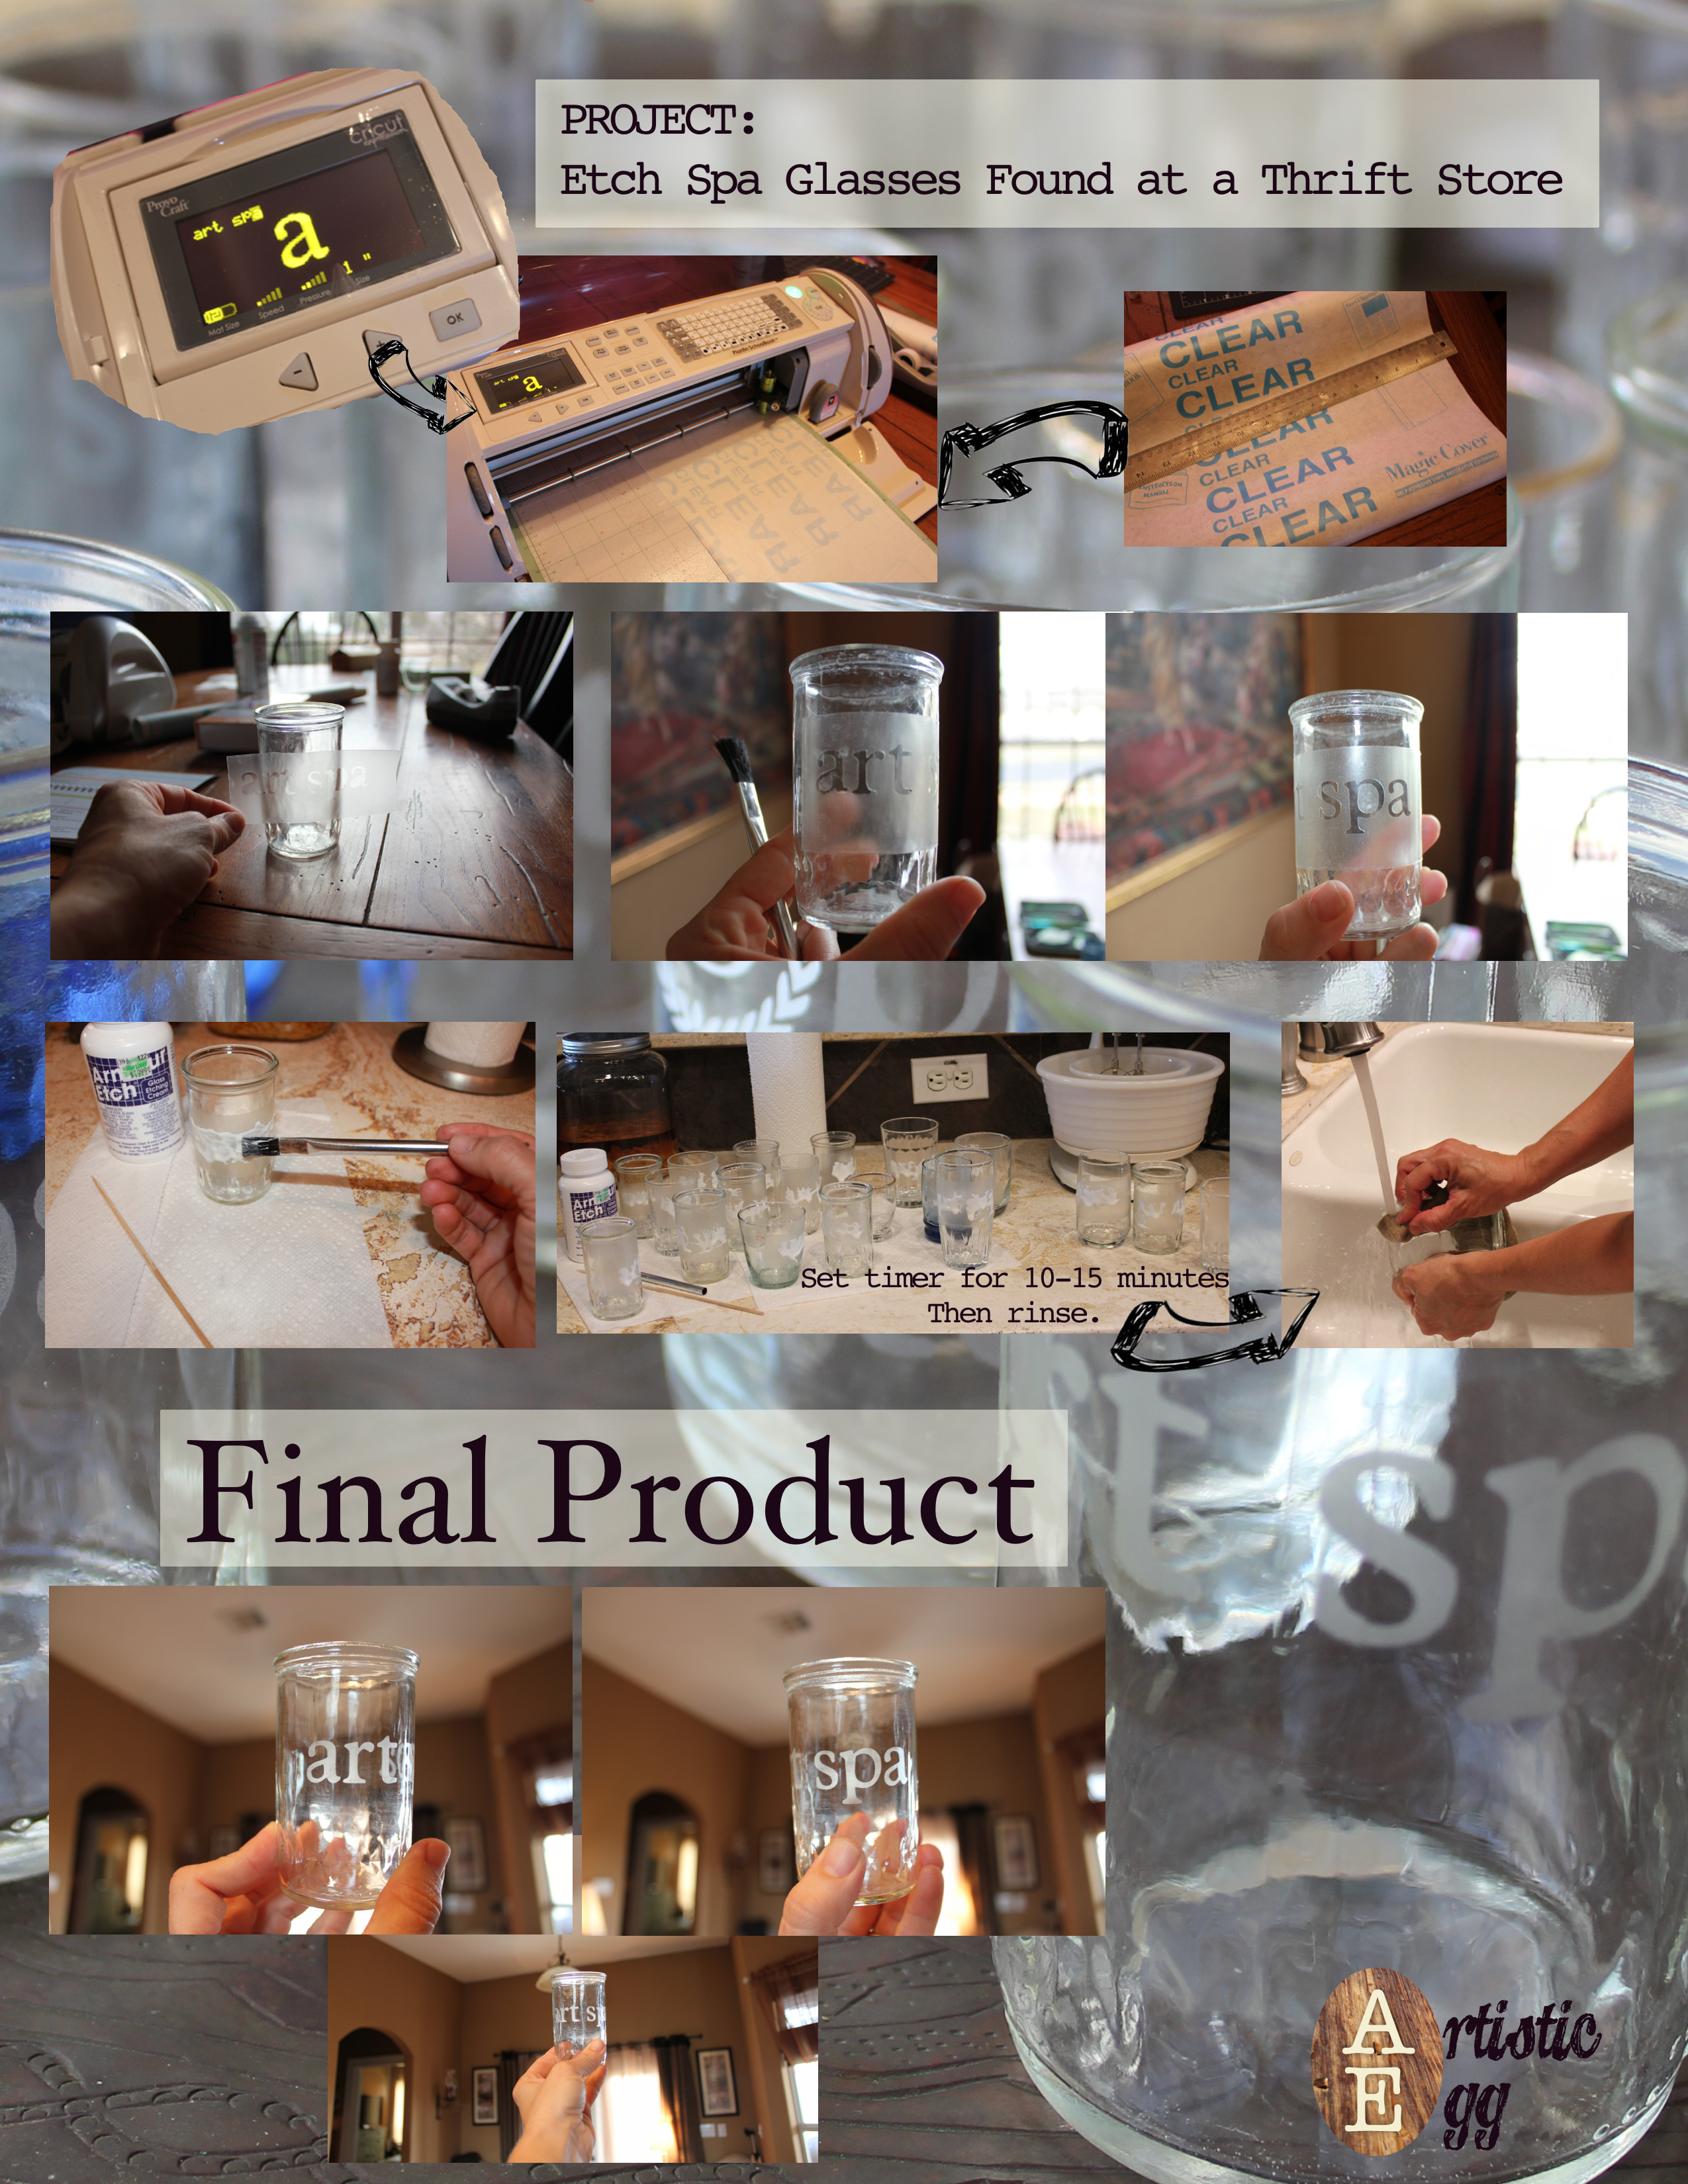
- Cut your adhesive paper to fit onto your Cricut mat (we taped the sides down to the mat) and insert into the Cricut.
- I put the speed to lowest level, adjusted pressure to the second bar, and had blade on highest level (mine may be dull). I recommend doing a trial run to see what levels work best for you.
- Cut the stencil as straight as you can, making it easier to position the words as level as possible. Be sure to leave a little extra paper around words to prevent etching drips (unless you’re going for the Goth look).
- Peel off paper backing from the stencil. NOTE** The insides of some letters will remain, such as the circles in the “a”, “o”, “e”, “g”, etc. You will apply those in a bit. When applying the stencil hold it with both hands while the glass remains upright on the table. Allow just the center of the sticky paper to touch the glass, level it, then using your finger lightly tap both sides down. If it looks nice and straight, firmly press all letters making sure to eliminate any bubbles.
- Now you go back to the paper backing and get the little dots and apply to appropriate letters. This can be tricky and tweezers can be real nice at this point, um hum.
- Open up your Armour Etch and give a little stir with your wooden skewer. Dip brush and apply a nice layer to the stencil. Careful, if you add too much you’ll get the Goth Drips.
- Set timer to 10-15 minutes. Be sure to check on it to make sure you don’t get any drips.
- Rinse off with paper towel or rag under running water.
- Peel off sticker/stencil to reveal your masterpiece!